Downloading and Download Notifications
Video can be requested for downloading from the history browser. When a video is ready, it will appear under the notifications flag in the top right of the web interface. It will also appear on Notifications page with a link for downloading as well as a link to copy the checksum of the file. Video can be downloaded by any user with permission to download. A link is available for any video within retention that opens the history browser with the area of download selected.
Download from History Browser
To initiate a download, from the history browser, select “Download.” The closest full video area will be selected and the default type will be “Video.” If desired, select “Time Stamp” and choose the time zone to add notes – they will appear on the “Notifications” page and will be searchable.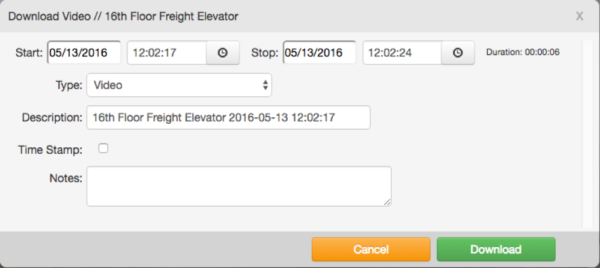
Adding Notes when Downloading Video
Next to “Type,” click the dropdown menu and note the options:
- Video – This will download an MP4 file of the full-quality video.
- Bundle – This will download a zip file containing both the preview video and full video(s). If an area is marked that contains multiple full video areas, they will all be included as separate MP4 files.

“Type” Dropdown Menu Options
To select multiple areas to download, hold down “shift” and click and drag with your mouse.
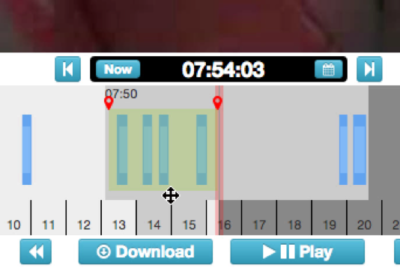
Selecting Multiple Areas to Download
If “Preview Timelapse” is selected as the type, you can choose a speed from 1x to 16x. The preview images will be used to create an MP4 file at your selected speed.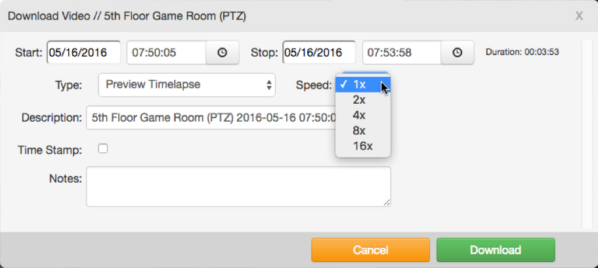
“Preview Timelapse” Speed Options
All options allow for a time stamp – when checking the box for “Time Stamp,” select your time zone from the dropdown menu.
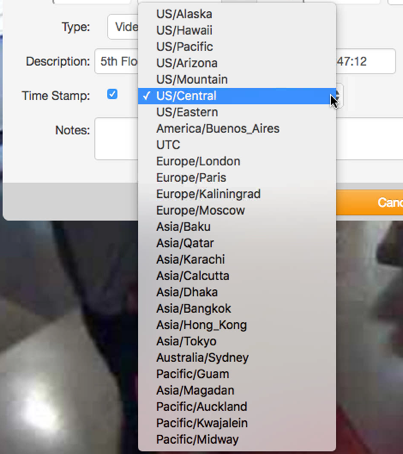
“Time Stamp” Dropdown Menu Options
If you select a blue area (full video) and click “Download,” only the current blue area will be selected for download.
If the file is ready, it will automatically download. If it takes longer than a few seconds, then you will be notified via the notification flag in the upper right-hand corner (next to your username) when the file is ready to download.
Clicking on the flag shows your last few notifications. If an entry is titled “Video ready to download,” click on the notification and the download will start immediately. Depending on your browser settings, you may have the option to choose where the files are saved. 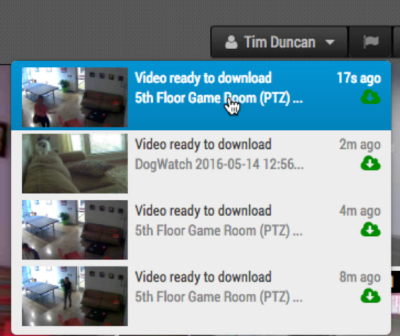
Notifications Flag
The “Notifications” page lists your video downloads and notes their status. A progress bar will show for files being prepared for download.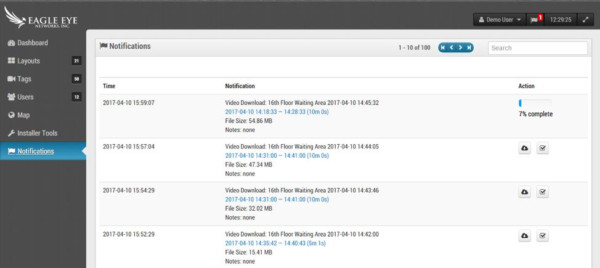
Notifications and Progress Bar
When the files are ready to download, a download link and a checksum button will appear. You can click the Download button to download the file and click the Checksum button to copy the checksum to your clipboard.
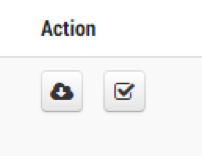
Download Button and Checksum Button
The “Notifications” page will hold the data for your last 100 downloads. However, the video will only remain available during the camera’s retention period. After a week, you can request the same video again. Click the Request Again button to prepare the video for downloading – the progress will show, and the download icon will appear when it’s ready.
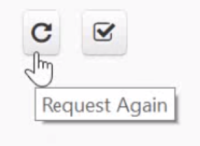
Request Again Button
Link to History Browser
On the “Notifications” page, the time range listed for a download will be in blue (if it’s within the retention period). This text is a link, which will open the history browser with the time range selected when clicked. This makes it possible to quickly review and to make new download requests for the same time range, where you may want to add/remove the time stamp or change the description (which is the file name).
Notes can be added or updated anytime on the “Notifications” page by clicking in the “Notes” field. This brings up a text entry box, which is editable.
Editing Notes
When finished, press “enter” on your keyboard to save the changes. The description and notes are searchable by typing key phrases in the search box, which is located in the upper right-hand corner of the “Notifications” page. 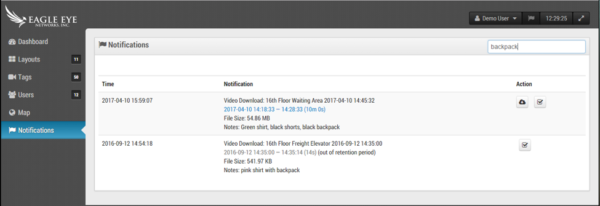
Search Function
Other posts that might interest you

Bandwidth Recommendations
Executive Summary: We recommend 100kbps per camera for our realtime previews stream. You can adjust the quality on those by raising or lowering the settings but those are safe averages.…
April 17, 2014
Common Support Questions
How do I add a bridge? Each bridge comes with a unique Attach ID. The Attach ID is used to associate that bridge with an account. In order to add…
April 17, 2014
Enabling Axis ONVIF support
Axis makes terrific cameras and as a founding member of the ONVIF standard they are a great compliment to our product. Axis handles security for their cameras uniquely and the…
April 22, 2014


